Part 1. How to Access iCloud Storage on Mac
If you have run out of iCloud storage for backups of either your Mac or iOS files, you can now easily manage the backups and data for your devices right on your Mac. Accessing your iCloud to manage your storage on Mac is easy; all you have to do is follow the steps below:
Step 1: Open Apple menu and then tap System Preferences.
Step 2: Click iCloud and then tap Manage.

Part 2. How to Manage iCloud Storage on Mac
1. Manage iCloud Storage by Deleting Old Backup
As we had mentioned earlier on, iCloud gives you fixed storage space. Sometimes, this storage space can become full. If you still want to back up your device, the only option available is to delete your old iCloud backups. This can be done on your mac by following the steps below:
Step 1: Open the Apple Menu and select System Preferences.
Step 2: Tap iCloud and then tap Manage.
Step 3: On the left, tap Backups.
Step 4: On the right, choose an iOS device whose backup you wish to delete. Tap Delete.

Usually a lot of backup is useless, it only takes up space. So if you want more iCloud storage, it is a good option to clean up the old backup.
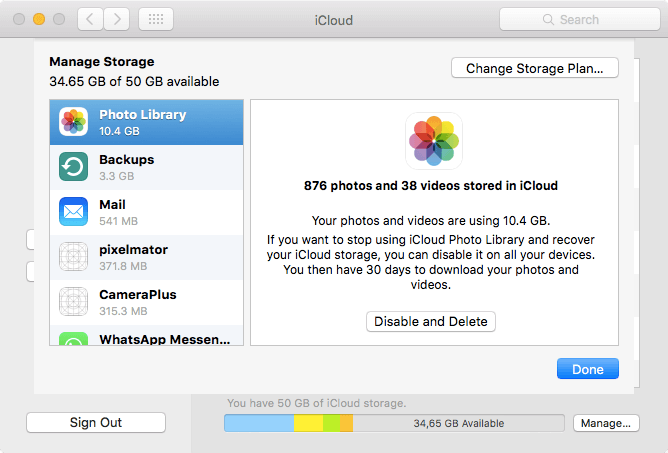
2. Manage iCloud Storage by Stopping Using iCloud Photo Library
When iCloud Photo Library is enabled, all the pictures you take will be stored on iCloud. Your deleted photos will remain on iCloud for 30 days. This can take too much of your iCloud space. The best thing you can do is disable iCloud Photo Library to save your storage space. To do this on Mac, follow the steps below:
Step 1: Open Apple Menu and select System Preferences.
Step 2: Tap iCloud and then click Manage.
Step 3: Choose Photo Library. Choose Disable and Delete.
3. Manage iCloud Storage by Removing Files and Folders
If you need some little extra space on iCloud or you need to remove some few files, this can be done on Mac. Follow the steps below to do this:
Also Read:4 Best Chrome Extensions to Download YouTube Videos
Also Read:Top 5 Legal Websites to Download Free Ringtones for iPhone XS/X/8/7/6s/6
Also Read:How to Go Live on Tik Tok/Musical.ly in 2019Step 1: Open the Finder Window.
Step 2: Tap iCloud Drive.
Step 3: To view the files inside a folder, double-click it.
Step 4: Choose a file that you wish to delete and then right click on the file.
Step 5: Choose Move to Trash. This deletes the file. To delete a full folder, you can just right-click on it and choose Move to Trash.

Part 3. One Thing You Should Know about iCloud Storage
Almost every iPhone user is using iCloud to backup files, but very few people are aware of a problem that iCloud storage may lead to privacy leak. iCloud is not as secure as it seems and privacy leakages do happen around you. Rather than knowing how to manage iCloud storage on your computer, you should know how to protect your personal privacy on iPhone.
If you already have private information on iCloud and you wish to avoid a possible privacy leak, you should delete this data. Just save it on your phone and delete it when you don't need it. If you use the normal methods to delete the data, it can be recovered quite easily. To avoid private data recovery, the best thing you can do is use iMyFone Umate Pro for Windows or iMyFone Umate Pro for Mac to delete your data. This is the best iOS data eraser you can use to protect your privacy.
The features offered by iMyFone Umate Pro include:Sponsor ads:Top 7 Best Superhero wallpaper Apps for Android 2019
Also Read:Receive SMS Online for Free via Temporary Phone Numbers


No comments:
Post a Comment